Overview
You can add an account in Quicken to track almost any account, asset, or liability you have in the real world. The more you include, the more closely Quicken reflects your true financial situation.
Before you begin
If you prefer to add accounts that you manually enter transactions into (not connected to a bank), you can find steps for that
here .If you are experiencing connectivity issues while trying to add accounts,
click here .
Instructions
In most cases, you'll want to add all your accounts in the same Quicken data file, so that you can track your overall financial situation. You can add up to 512 accounts per account type.
To add accounts (such as checking, savings, and credit cards):
At the top of the Account Bar, click the + (plus sign) button.
Type in the name of your financial institution.
Select your financial institution from the results list and click Next.
Follow the on-screen instructions. Click Help for more information.
Note: Some account types are not available in all versions of Quicken. To view which account types are supported in your Quicken product, visit this
Additional Information for Specific Account Types
Investing & Retirement
For 529 Accounts: Your other option is to manually add your 529 plan to Quicken with the basic procedure for adding an investment account. When you manually add a 529 plan to Quicken, Quicken automatically marks the account as tax-deferred for you.
Property, Assets, Loans, & Debt
Important: If you have an existing, manual loan account that isn't downloading from your financial institution, there is not a way to connect that existing account to your financial institution. You will need to add that loan into Quicken again as a connected account.
When you add a new account, Quicken adds it to the Account List (choose Tools menu > Account List).
1. At the top of the Account Bar, click the + (plus sign) button.
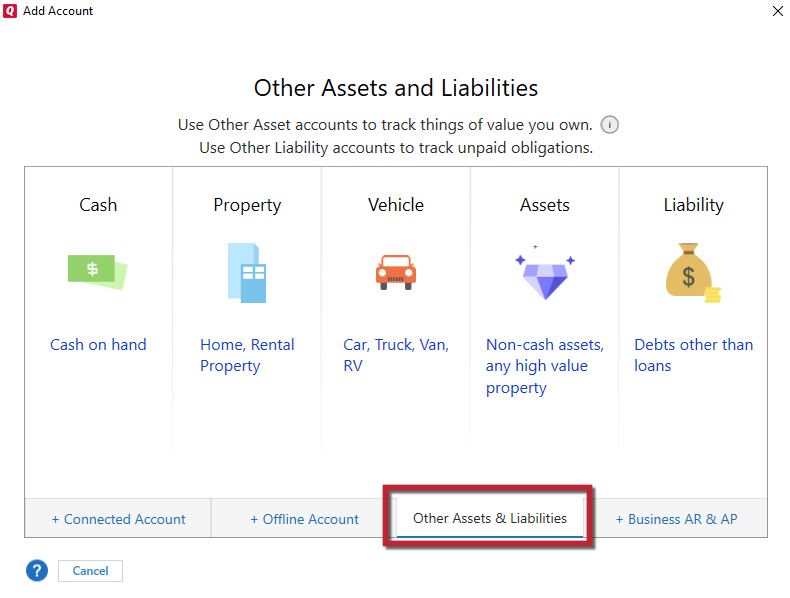
2. Click the Other Assets & Liabilities tab.

How can we help?
✖Still need help? Contact Us
3. Select the type of Asset or Loan account you want to add.
4. During the setup process, you'll be asked a few questions. Answer the questions and follow the on-screen instructions.
Business Accounting
This feature is only available in Quicken Business & Personal
To add business accounts:
Click the Business tab.
Click the Business Actions button, then choose Business Accounts > Add Account.
Select the type of account you want to add (you can select Accounts Payable/Receivable, Spending & Savings, Assets, or Loans).
Follow the on-screen instructions. Click Help for more information.
Note: After adding a new invoices/receivables account, you can enter any previously issued but unpaid invoices that you want to track. When you create the invoice, just remember to predate it.
For expanded instructions, see
Rental Property
This feature is only available in Quicken Business & Personal
Click the Rental Property tab.
Click the Properties & Tenants button and choose Add Property.
Enter the name, tag, and address for the property you own.
Select the appropriate option:
Click Single unit property if this is a single unit property.
Click Multiunit property if this is a multiunit property. A multiunit property is when you divide your property into units. A unit can be a floor, an apartment, or even a room. For example, in an apartment, you can consider each room as a separate unit. Or, in a duplex property, you can consider each floor as a separate unit.
Enter a unit name or unit number for each unit in the property.
Click Add more units to add more units. (Optional)
Identify whether you want to track the value of the property. (Optional)
In the Property Documents tab, add the documents pertaining to this property.
Click OK.
For expanded instructions, see
Quicken for Mac users
For help with adding accounts in Quicken for Mac,
