Quicken Product Highlights October 2020
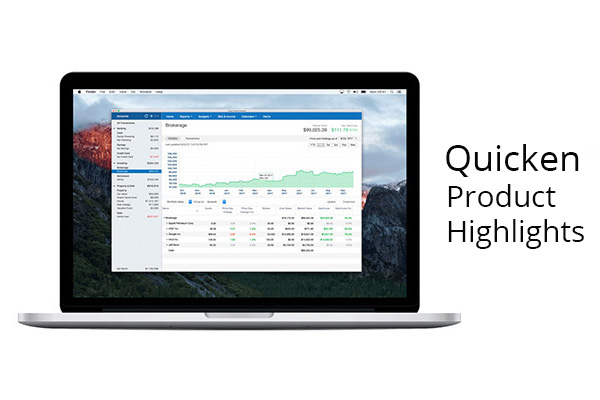
This month, the Quicken team is excited to share some of our featured capabilities in Quicken reporting. In Quicken for Windows, learn how to customize any report—not just the data it includes, but even things like the font and other visual settings. In Quicken for Mac, take a tour of the new Quicken Report Center.
Quicken for Windows: Report Customization
Quicken’s reports can show you just about anything you can imagine about your finances. See your spending by category, payee, date, or even by tags that you create yourself, like for your kids or for a specific vacation, so you can keep track of your spending across categories. Or track your investments or net worth over time, so you can see your financial performance and trends.
But that’s just the tip of the iceberg. You can customize any report to show only the information you want, and you can save that report to refer to it again later. Quicken will keep it updated automatically. You can even customize the way your reports look, right down to the size of the font they use.
Customizing the information in your reports
If you want to change the information included in a report, like the categories it includes or its time frame, you can customize any report in Quicken for Windows by clicking on the Gear icon and using the tabs in the resulting dialog box.
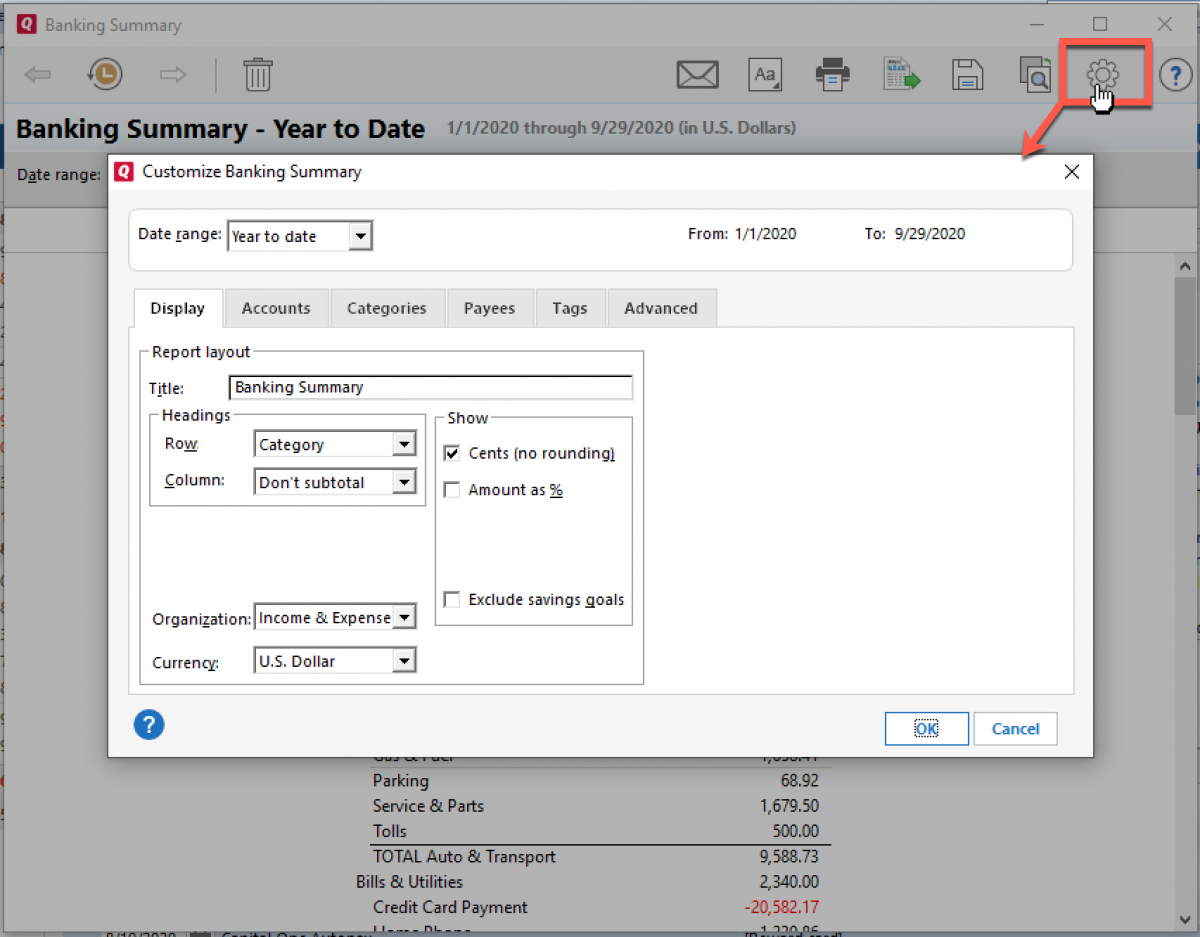
Use the Accounts, Categories and Payee tabs to choose the specific accounts, categories, and payees you want to see. Or use the Advanced tab to see other customization options that are specific to the report you’re running.
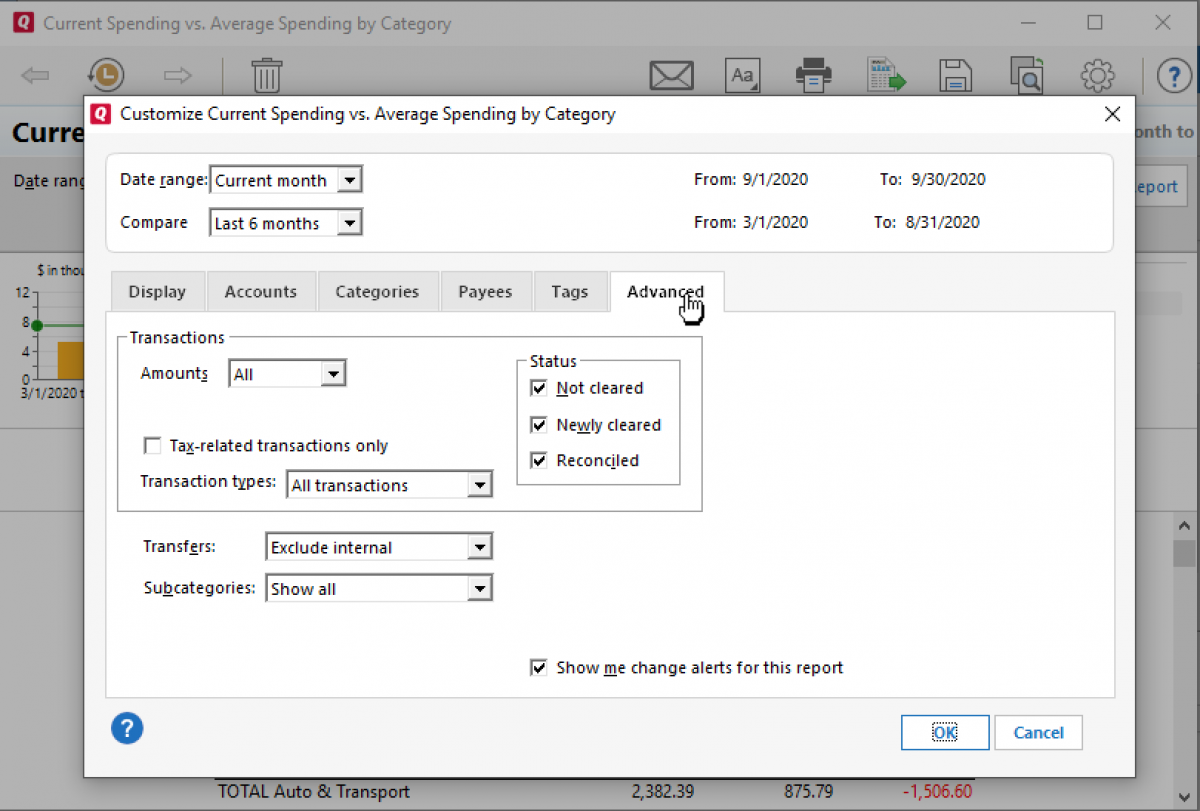
Be sure to check out the Advanced tab for each report because each one is unique, offering different ways to look at your finances. For example, you can generate a report that shows you all your restaurant transactions that are over $100 or a report that shows all your entertainment spending of under $10, just to help you see how different kinds of spending might be adding up.
Whenever you customize a report, you can save that version of the report so you don’t have to customize it every time.
Customizing the look and feel of your reports
We also offer options for customizing the way your reports look. To see all your options, click on Report Visual and Font Settings on the report banner (highlighted below). The settings you change here will apply to all your reports. You can also access this screen by clicking on Edit -> Preferences menu -> Reports only.
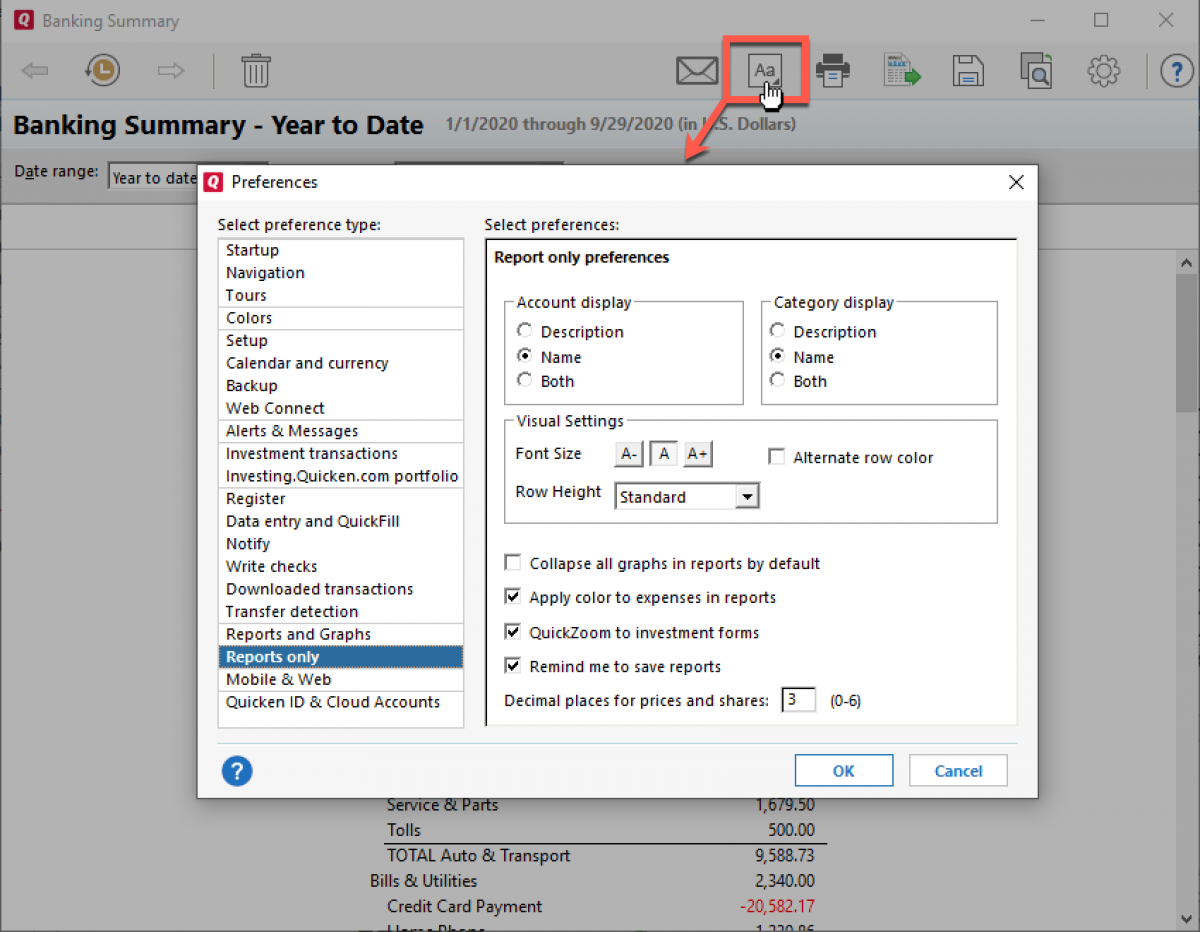
Use Font Size to change the size of the font Quicken uses in your reports. Row Height lets you change the height of each row, depending on whether you want more or less vertical space.
To do even more with Quicken reports, you can email them to yourself, or anyone else, or you can export them as .pdf, .csv, or .txt files.
Quicken for Mac: Report Center
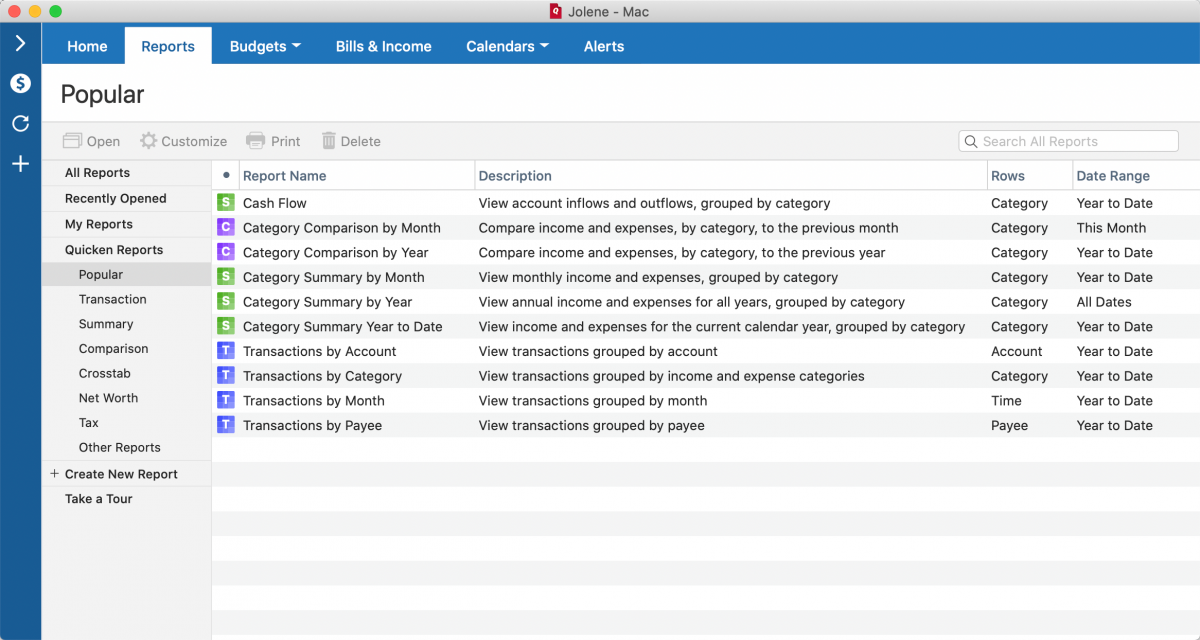
Quicken for Mac now features a brand new report center with a redesigned reporting experience. The report center offers more interactivity and searchability, better organization, stand-alone windows, and new reports. The Take a Tour option is always available at the bottom left to show you around.
The report center groups Quicken’s built-in reports together by type, so you can easily find what you’re looking for. You’ll see new groups for Net Worth reports, Tax reports, and Transaction reports, and report lists now include descriptions of each report to help you choose the one you need. You can even add your own descriptions to your custom reports.
You’ll also see a new Popular group, including ten of the most common and useful reports. If you haven’t been using Quicken’s reports, it’s a great place to start.
Reports now appear in separate windows, so you can still access your report list or anything else in Quicken while you’re viewing a report. If you run a second report at the same time, that one will appear in a new window, so you can look at two or more reports next to each other.
Be sure to check out the four new Net Worth reports and the new Cash Flow Comparison report. No matter what report you run, Quicken will prompt you to save that report if you make any changes to it. This makes it easier to see your finances the same way next time.
It’s also easier to expand or collapse all your report sections at once when you’re viewing a report. Use the new Table Options button and choose Expand All or Collapse All to expand or collapse all of a report’s subsections at once. If you’re viewing a transaction report, you can use the Columns option to change the report’s columns. You can even print your reports with the sections expanded or collapsed, whichever works best for your needs.
To share your own unique tips and tricks for using Quicken, join our Quicken Community forums.
Quicken has made the material on this blog available for informational purposes only. Use of this website constitutes agreement to our Terms of Use and Privacy Policy. Quicken does not offer advisory or brokerage services, does not recommend the purchase or sale of any particular securities or other investments, and does not offer tax advice. For any such advice, please consult a professional.
