
How to Prepare an Invoice in 7 Easy Steps
If you’re a small business owner, self-employed, or work for a small/local company, you might find yourself suddenly in charge of preparing and sending invoices. While it might sound complicated, it’s actually really easy to understand how to use them.
An invoice is a document that outlines the history and details of a transaction between the parties involved: the buyer and the seller. An invoice helps to create trust between your business and the client, knowing everything is documented and properly recorded.
Here’s how to prepare one.
Invoices and what they look like
If you supplied goods or services for a client, preparing an invoice is easy. You create a record that exactly outlines the nature of the work or goods and at what prices or rates, and you submit it.
A simple invoice made with Google Sheets could look like this:
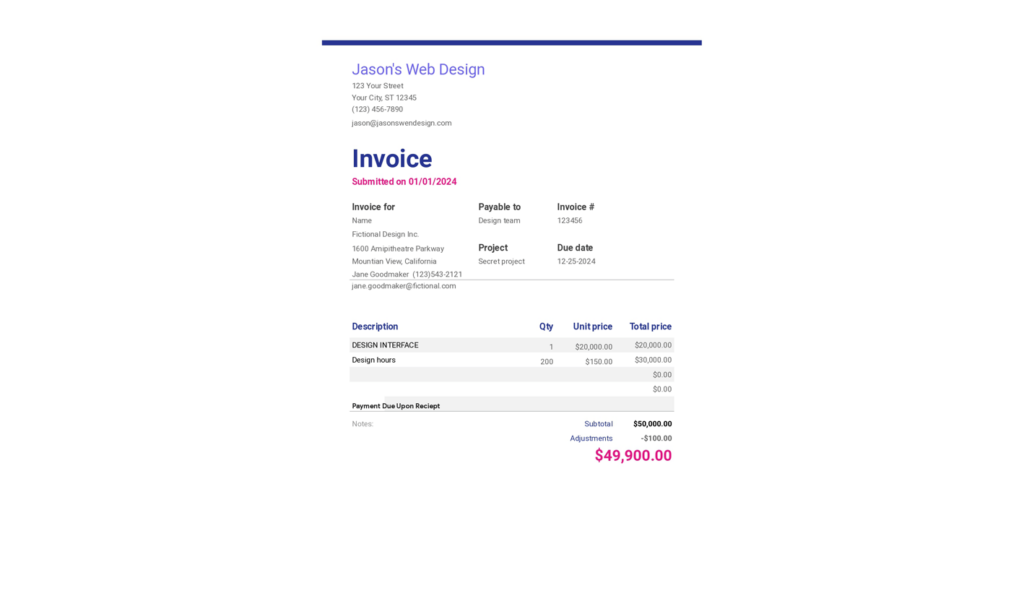
Of course, this is a simple and hypothetical example, but you can see the elements of an invoice present, from the company address to invoice number, and to transaction details and amounts.
What you need to prepare an invoice
You will typically see the following items on an invoice:
- A logo and possibly other branding, like your company colors. This is where your brand should shine.
Also add:
- Your company’s details, including:
- Name (you or your company)
- Address
- Phone
- The information of the client or business you are billing:
- Customer or company name
- Company address
- Contact email
- Contact phone
- The invoice details:
- Invoice number (each number should be unique)
- Invoice date (also known as the invoice issue date) and due date
- Invoice payment terms
The next items are important as they’ll be responsible for itemizing exactly what you’re billing the client for. You want to keep it simple but descriptive.
- Itemize the list of the services rendered or goods provided
- Include the quantity of each item, unit price, total amount owed for each item, and a brief description if necessary.
- The final amount due (including any tax). If this is a service charged by the hour, be sure to include the hourly rate.
- Also, list any additional fees involved with the delivery or creation of the goods/services.
- A payment link if you have one available.
Step-by-step guide to prepare an invoice
Now that you’ve gathered all the information you need, the rest is easy!
Step 1: Choose a template
You’ll never have to create one from scratch. Not only are there quite a few included with Microsoft Word and Google Sheets, you can also find add-ons and templates online in Canva and other design and word-processing programs.
Invoice templates save time by providing a ready-made structure, so you just fill in the details without worrying about the layout or formatting. They also ensure consistency and professionalism, making your invoices look polished and easy to read every time.
Step 2: Add your business information
Add brand elements like your company colors and logos, so it’s clear to the recipient who the invoice is from. Then, make sure you add your name or your business name, address, phone number, and email address. Go over these personal details carefully, since you wouldn’t want a case of mistaken identity to interfere with getting paid!
Step 3: Add client information
Next, add the client’s information, like contact name, company name, company address, contact email, and contact phone. Double-check this information so you don’t end up billing the wrong person.
Step 4: List products/services
Describe the work or service completed, products sold, or whatever is changing hands between your company and theirs that will cost them money. Be descriptive, but use language that both you and the client will understand.
Step 5: Set payment terms
Now, set the due date and list the payment terms. If you have your own bank link, be sure to list it, but many times, clients will have their own processors that handle paying invoices for them.
Step 6: Include invoice number
Each invoice should have a unique number — either numbered sequentially or following your own system. Just make sure no number is ever repeated to avoid confusion and missed payments.
Step 7: Check carefully for errors
If you want to avoid getting paid late, the best thing you can do is check and recheck the invoice for errors before you send it out.
Best practices to prepare an invoice and get paid fast
Make your invoices clear and professional. Use a simple layout with easy-to-read fonts and well-organized sections. Include all essential details, like your business information, the client’s name, and a clear description of the products or services provided. Be specific with pricing, due dates, and payment terms to avoid any confusion.
Good communication with a client is key — from the beginning, clearly state your payment terms, including preferred methods and any late fees. This helps set expectations upfront and encourages prompt payments.
Make sure not to leave out key details, such as invoice numbers, due dates, or itemized descriptions. Unclear pricing can also lead to confusion, which may delay payments or result in disputes. To avoid these issues, double-check that all information is included and easy to understand.
Be thorough by reviewing your invoice for accuracy before sending it — this helps prevent errors and ensures a smooth payment process. The more specific your invoice is, the faster you’ll get paid.
Send your invoice
Now that you’ve checked for errors, turn your invoice into a PDF and send it to the client. Always keep a copy on your end for your personal records.
It’s time to get paid!
Quicken has made the material on this blog available for informational purposes only. Use of this website constitutes agreement to our Terms of Use and Privacy Policy. Quicken does not offer advisory or brokerage services, does not recommend the purchase or sale of any particular securities or other investments, and does not offer tax advice. For any such advice, please consult a professional.


