15 Ways to Organize Your Pantry into a Work of Art
Organizing a pantry is easy — it can help you save time in the kitchen, feel blissfully organized, and even save money in the long run.
Ready? Let’s go!
15 tips to help you organize your pantry
These 15 tips can help you simplify your pantry, and your life.
1. Start with a blank slate
If you’re organizing your pantry because of a diet or change in lifestyle, now would be a great time to donate all the food and grocery items you’ll no longer use. Also, check all the expiration dates and throw away anything that’s gone south.
Take everything out of the pantry until you’re left with a clean slate. Consider yourself an artist about to create a masterpiece of cleanliness and organization.
Scrub everything thoroughly, using your favorite cleaning products to make sure everything is germ-free.
2. Consider shelf paper or liners
Shelf paper or liners can help with cleanliness and organization. If your shelves have seen better days, shelf paper can brighten them up without a costly renovation. Liners can also prevent loose food from falling between wire shelves, and catch any runoff from wet or leaky items.
The best choice is often a neutral color so your labels can be the focus — you don’t want the inside of your pantry to be too busy or chaotic.
While your first thought may be to go for the cheaper liners, you may end up spending more in the long run if you don’t pick quality. Get some that are heavy-duty and won’t easily come apart if they get wet or oily. Some even come with their own fasteners to ensure they’ll stay in place.
3. Add some color
With a clean, empty pantry, start thinking about color. Do you want to paint the walls wile you have the opportunity? Storing your dry goods against a colorful background will make everything seem just a bit more orderly. If you do decide to change the walls, make sure the finish you choose is a bit glossy and easy to keep clean.
Choose something you’ll enjoy looking at. You may also want to consider the lighting. Under-shelf lights provide a bright, colorful canvas and can make all your food look more inviting — and easier to see! With a little bit of creativity, that old pantry can become a work of art.
4. Take inventory
The canvas has been prepared — it’s time to turn to what will be filling the space. Take inventory of everything you have left. What’s still good after donating or throwing away the expired stuff? If you need to replenish your provisions for your new, improved pantry, do that now.
5. Categorize everything
Next, put everything into categories and decide where in the pantry you want to keep specific items. What’s the perfect place for all your baking needs, snacks, or spices? You don’t want any bulky or heavy items up high, and you’ll want the things you use the most at eye level. Put some time into the composition so you don’t run into issues later.
6. Think about what you use most
If you only bake cookies once a month, would it make sense to give the flour and chocolate chips more priority? Would the wicker basket that holds the microwave popcorn, chocolate bars, and candy that you eat when streaming a movie go better closer to the door? Taking a bit of time to answer these kinds of questions will make your pantry an easier space to navigate.
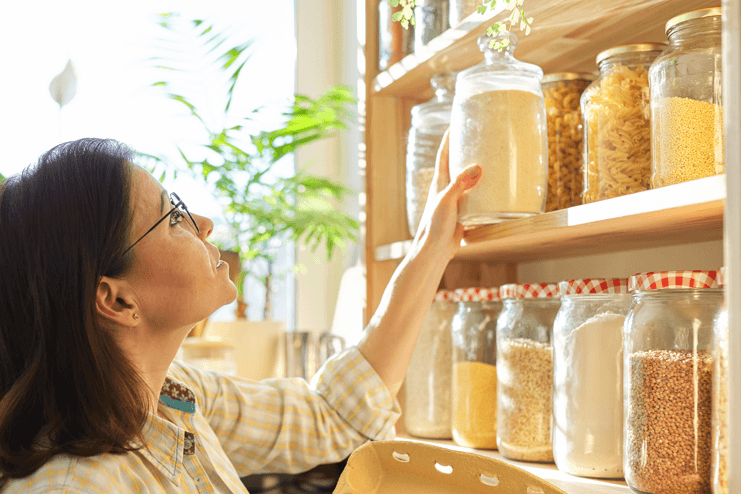
7. Store bulk and loose items in containers
For your bulk items like pasta, flours, and cereals, clear containers with lids might be the way to go. There are a number of different styles and materials, from glass jars with wooden lids to plastic jars with air-tight locking latches. Measure your shelves and pick out your containers all at once for a more uniform look.
For loose items like protein bars and snacks, wicker baskets look wonderful against any color background. From a tight weave to a knotted look, wicker adds warmth and comfort to your shelves and keeps your bigger loose items from falling to the floor.
Consider installing metal mesh shelves underneath the existing shelves to house your heavier canned goods. Larger mesh drawers can be a great option for breads too, as they won’t crush your precious pumpernickel.
8. Keep spices in a rack
What will you do with your spices? You probably use some of them often — others, not so much. So it can be tough to decide where to put them. Plus, storing them all together on one shelf can make them hard to look through.
Consider a separate spice rack (or more than one) to free up more pantry space. These specialized racks are easy to install on any wall in the kitchen, so you can keep your favorites right where you use them. For the rest, consider a spot that’s a bit more out of the way.
Depending on your pantry, you might even be able to hang a spice rack on the back of the door, so you can keep your spices in the pantry without taking up precious shelf space.
9. Keep track of expiration dates
If you’ve ever worked in a commercial kitchen or fast food restaurant, you’ve likely heard the term FIFO — First In, First Out. As you add new products to your pantry, make sure you add the new items behind the old ones so nothing expires before you can use it all.
Moving canned goods to the front and stocking new cans toward the back is a good habit to get into, and you won’t ruin your monthly budget by having to throw food away.
10. Label, label, label
If you opted for new containers, it might be time to go buy a label printer (but painter’s tape and a Sharpie work just as well). You can be expensive and fancy, cheap and streamlined, or old school as long as you remember to label new products as they go into your pantry.
Labels are a great way to add a finishing touch to your containers with your own personal style.
11. Make a spot for the kids and fur babies
Before you finalize your pantry, pick out a special spot for your kids or pets. If you have kids, could you put a bin at their eye level for them to see when they get home from school? Imagine a bin full of healthy snacks and protein bars.
For pets, consider adding a bin or wicker basket with all the treats, food, litter, flea collars, and special shampoo you need — so it will always be in reach when you need it.
12. Use door space and empty walls
If you’ve made a budget and shop often, there’s a real chance you’ve filled every square inch of shelf and drawer space. What about your small appliances? Look for places to hang them on walls or on the back of the pantry door (if your spice rack isn’t already there). Get creative — the more space you free up for these appliances, the more organized your kitchen and pantry will be!
13. Pay special attention to baking supplies
If you love to bake, it might be a good idea to keep all your baking needs in one accessible place as you walk in the pantry. There’s nothing worse than having to hunt for measuring cups, baking powder, or butterscotch chips.
You can even add some mugs and a bin of flavored coffee to make this your special place with all the little unique items that make baking so enjoyable. From baking sheets to baking soda, you’ll always know where everything is stored.
14. Don’t neglect your budget
Using Quicken Simplifi to create and maintain your budget can help you make sure that you always have enough money at the end of the month to fill those empty spaces.
To make a food budget, start by planning a menu for the week, considering your work and entertainment schedule and what kinds of food you prefer. Look at local grocery store weekly ads to plan meals around sale items, and stock up on essentials. See what you have left over from last week, andmake a grocery list based on your menu. Plan for leftovers and use them in future meals to save even more.
A good budget goes a long way toward making sure you always have plenty of food on hand when you need it.
15. Keep it up!
Once you have everything how you like it, take a picture! You can always refer back to it to help keep this space uncluttered and organized. All it takes is a bit of focus. Spend some time each week putting everything where it should be, and always put everything back in its place.
You’ve created a Picasso in your pantry. Now sit back and enjoy!
Quicken has made the material on this blog available for informational purposes only. Use of this website constitutes agreement to our Terms of Use and Privacy Policy. Quicken does not offer advisory or brokerage services, does not recommend the purchase or sale of any particular securities or other investments, and does not offer tax advice. For any such advice, please consult a professional.


